Employee Management - Managers

Created by: Jeff
Step 1: Enable Manager Visibility in Account Settings
Before using the Company Managers feature, ensure the proper settings are enabled.
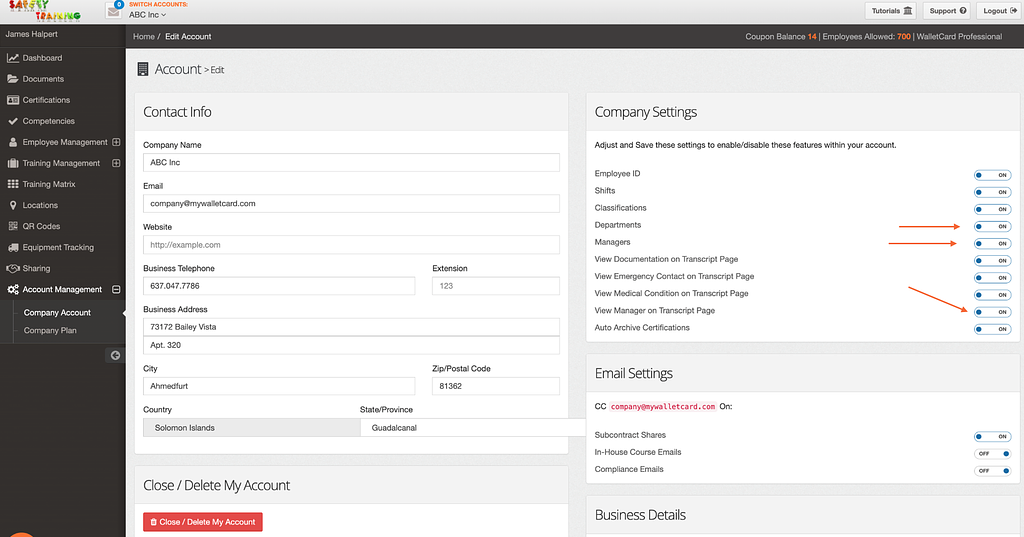
- Navigate to Account Management > Company Account.
- Scroll to the Company Settings section.
- Ensure the following settings are turned ON:
- Managers
- Departments
- View Manager on Transcript Page
When enabled:
- The manager(s) an employee reports to will be visible on the Employees Index table.
- Manager information will appear on the employee’s public transcript/profile page.
Step 2: Open the Managers Page
Click Employee Management in the left-hand navigation menu to expand the section.
Then click Managers.

Step 3: Review the Managers Index Page
Step 3: Review the Managers Index Page
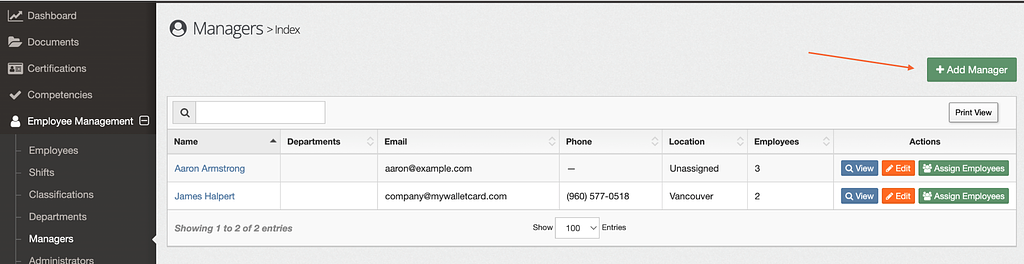
After clicking Managers, you will be taken to the Managers Index page.
Here you can:
- View all managers associated with your account
- See manager details including Departments, Email, Phone, Location, and Assigned Employees
- Click View to review a manager’s profile
- Click Edit to update manager information
- Click Assign Employees to link employees to a manager
- Click + Add Manager to create a new manager
Step 4: Add a New Manager
To add a manager:
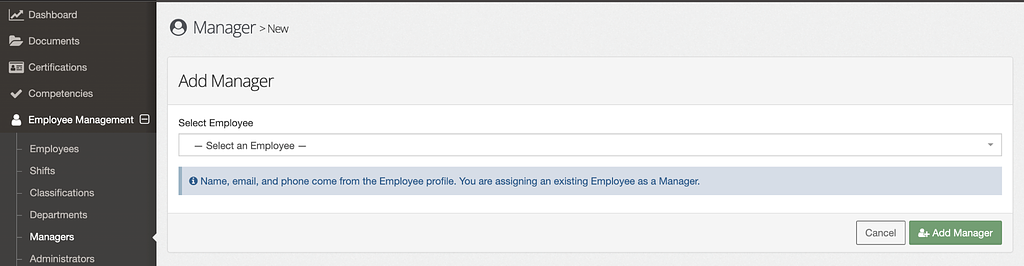
- Click + Add Manager.
- On the Add Manager page, select an existing employee from the Select Employee dropdown.
- Click Add Manager to confirm.
Note: Name, email, and phone information are automatically pulled from the employee profile. You are assigning an existing employee as a Manager.
Step 5: Manage and View Assigned Employees
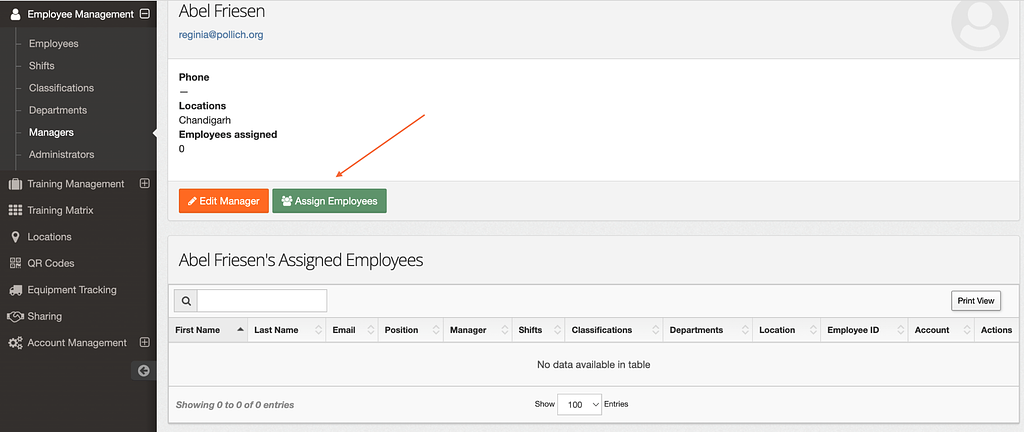
After selecting or adding a manager, you will be taken to the Manager Details page.
From here, you can:
- Click Edit Manager to update the manager’s information
- Click Assign Employees to assign employees
- View all employees currently associated with this manager under the Assigned Employees section
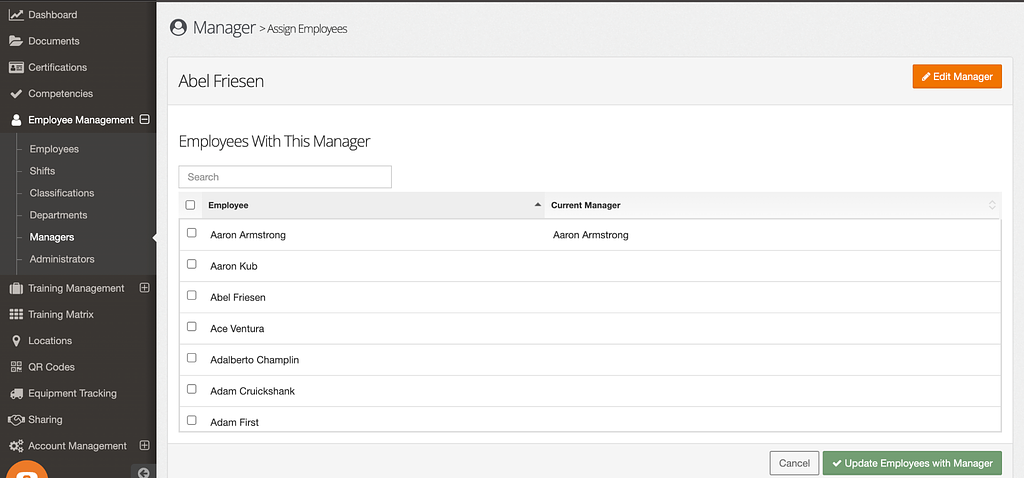
Step 6: Assign Employees to a Manager
To assign employees:
- Click Assign Employees from the Manager Details page.
- Use the Search bar or scroll through the employee list.
- Check the box next to each employee you would like to assign.
- Click Update Employees with Manager to save your changes.
The Current Manager column shows whether an employee is already assigned to another manager.
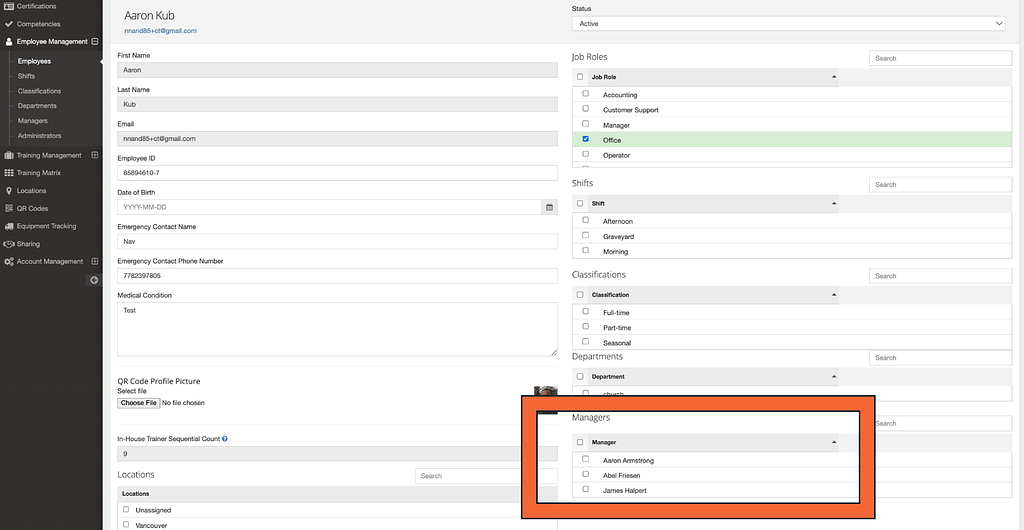
Step 7: Assign a Manager from the Employee Profile (Alternative Method)
You can also assign a manager directly from an employee record.
- Navigate to Employee Management > Employees.
- Click Edit on the employee.
- Scroll to the Managers section.
- Check the box next to the manager(s) you want assigned.
- Save your changes.
This method allows you to assign or update a manager while editing an individual employee record.
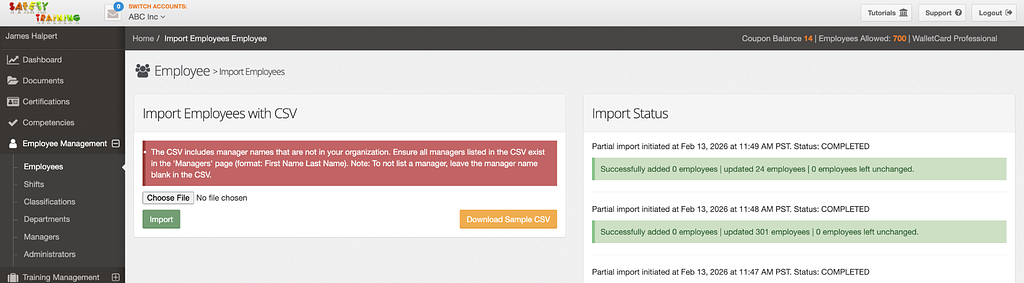
Step 8: Assign or Update Managers via CSV Import
Step 8: Assign or Update Managers via CSV Import
Managers can also be assigned or updated using the Employee Import (CSV) feature.
- Navigate to Employee Management > Employees.
- Click Import Employees.
- Use the CSV template and include the Manager column.
When using the Manager column:
- The manager must already be created in WalletCard.
- The name must match exactly and be formatted as:
First Name Last Name - If you do not want to assign a manager, leave the field blank.
Important:
If the manager name is misspelled or does not already exist in the platform, an error message will occur during the import process.
This allows you to bulk assign or update manager relationships efficiently.
Categories: Cardholder Company Platform Updates